Linelock
The disc brakes on my Dana 60 have mini drum parking brakes which don't do anything to stop 35" tires from rolling on a hill. The solution was simple, install a linelock.
A linelock is a valve that is installed in the brake line. It is normally open for normal braking, and can be closed to keep the line pressure at the brake calipers or shoes. To lock the brakes, you press down the pedal, engage the linelock, and when the pedal is released the brakes stay on. Disengage the linelock and the brakes release. In the closed position it's really a one way valve, so the linelock can be engaged first then the brakes pressed.
This makes for a very strong temporary parking brake. I say temporary for two reasons: 1) a fluid leak which may be too small to notice on normal braking will end up releasing the brakes. 2) some electric linelocks aren't designed to be continously on and the coil may overheat. The instructions even warn to not use it for more than a minute. These are afterall designed for racecars to do burnouts. But it's still great when you're on a steep hill or rocks and need to get out for a quick check of your truck or the trail.
Well on to the installation.
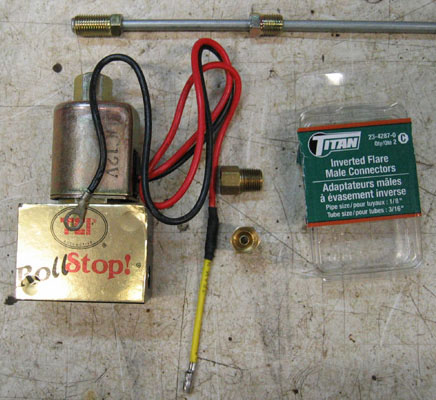
Most of the units I've seen are electrical which makes for easy installation. I've heard of mechanical units, but I didn't want to run brake lines inside the cab. I got a TCI RollStop at a local speed shop for $160 CDN. It came with an inline fuse holder and temporary pushbutton switch, both of which I didn't use as I have my own additional fuse pannel for new accessories and I needed a non-temporary switch that would stay on.
I started with the dirty work of installing the linelock. Since it only operates on one line, I had to decide on either the front or back brakes. Since the front brakes are bigger and stronger, that's where I wanted it. A note of caution, this should be installed after the proportioning valve, but on some vehicles like mine, the prop-valve doubles as a T for the front brake lines. Unless you want to use the linelock on only one wheel, you need to plug one hole on the prop-valve, run the other line through the linelock, and install a T after it.
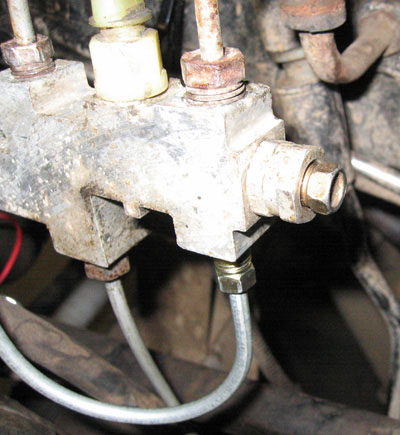
The plugged connection on the end is normally used for one caliper.
I had already done this to have a brake line setup similar to the rear with the T on the axle so it wasn't a problem. But I did have to buy an extra 12" piece of line to go between the prop-valve and linelock. The linelock has pipe thread holes so you need to get adapters to mate with your brake lines. The ones I got were called "Inverted Flare Male Connectors" for 1/8" pipe (linelock side) and 3/16" tube (brake line).
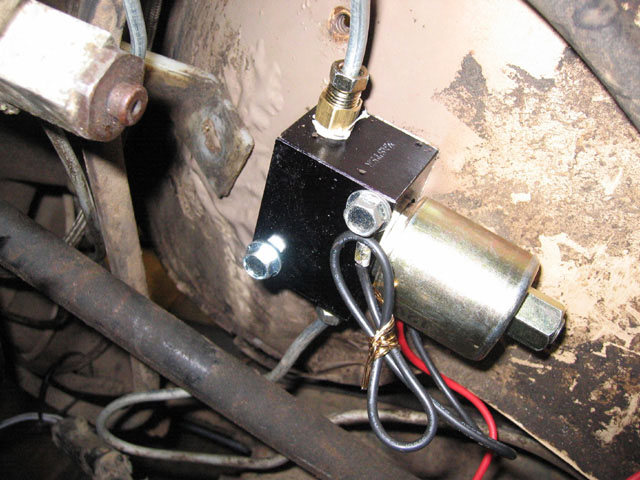
I installed a one pin connector to the red wire and a round eye terminal to the black. I attached the unit to the fender using the supplied sheet metal screws, first drilling 3/16" pilot holes. The one screw is also used for the ground terminal of the unit. Note that due to the one way valve operation there's in/master and out/brake connections. I removed the line from the prop-valve and pluged the hole to prevent fluid loss so I could take my time bending the original tube to plug to the bottom of the linelock. I then bent the new tube to fit from the master to the linelock, removed the (2nd) plug on the prop-valve and installed the line. A bit of brake bleeding and the worse was done.
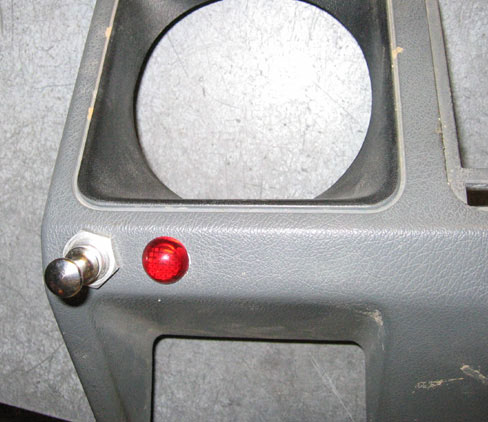
I got a push-pull switch from Canadian Tire as it's very difficult to turn on by mistake, and also not too easy to flick off by mistake like a toggle switch. So I don't forget it on and drive away, I got a very bright red light from Radio Shack.
For the switch I needed constant 12V. Like I said earlier I have an extra fuse panel connected direct to the battery so used it. It is best to connect to the battery and not go through other fuses as their failure will release the linelock. This wire is connected to the switch and on the other terminal I connected a wire to the linelock and the light. The ligh is also connected to a close ground point in the dash.
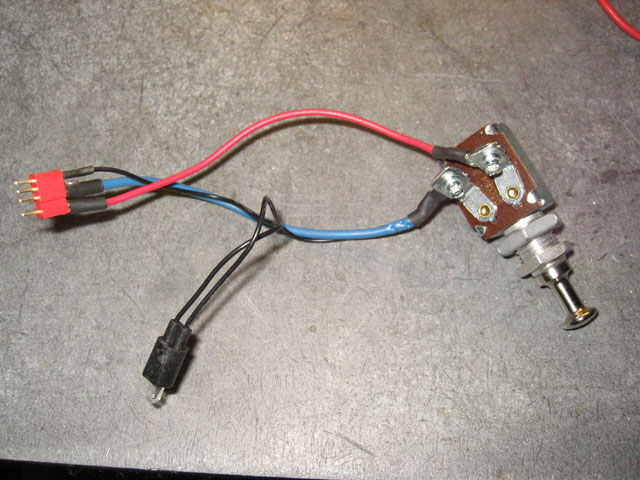
I like to have connectors on my dash mounted switches and lights, this makes it easier to remove dash panels and not have them dangling by the wires. The red connector you see in the picture I bought a long time ago from a hobby shop. They were sold for radio control car battery connections and called Deans Connectors. They're very good connectors, but I don't know if they are sold anymore, I just have a stash I keep picking from. Radio Shack and other electronic component stores have connectors with any number of connections.
Finally I drilled two 1/2" holes in the dash and installed the switch and light. All done.
Back to mods page.