Day 15
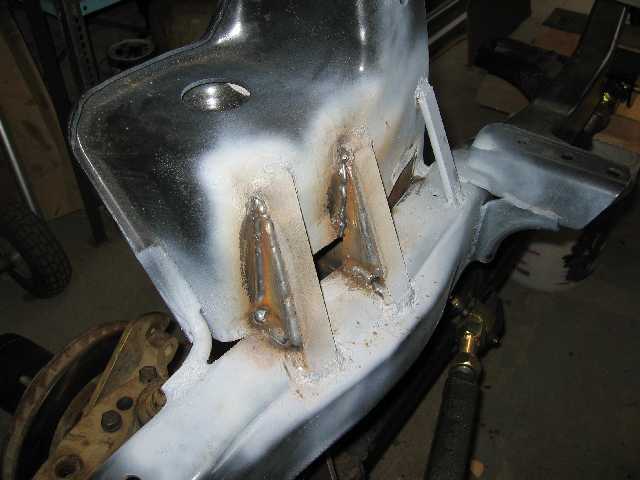
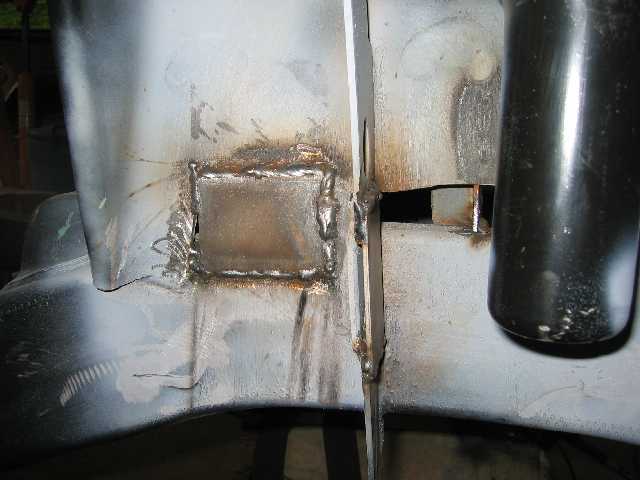
I revisited the upper coil buckets to add some re-enforcements by adding gussets to 2 of the angled bars at the back to keep them from buckling, and some extra plating on the middle rib and back of the bucket.


I looked at installing the track bar. The Clayton axle bracket has a spot for it in front (red bar in the pic below), but this interferes with my tie rod. Instead I'm going to place it above the axle tube and the upper radius arm brackets.
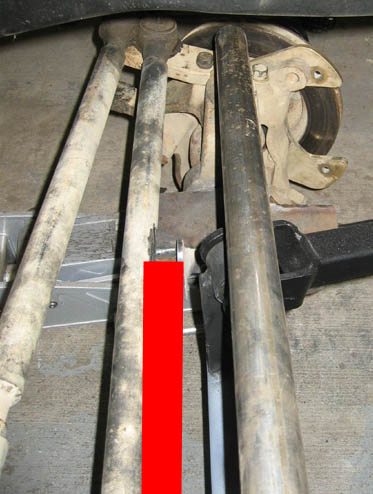
With the high steer my drag link angle is quite shallow, so the track bar doesn't need to mount low on the axle and will clear the upper brackets. I also checked that it won't hit the engine's oil pan by looking at my old frame.
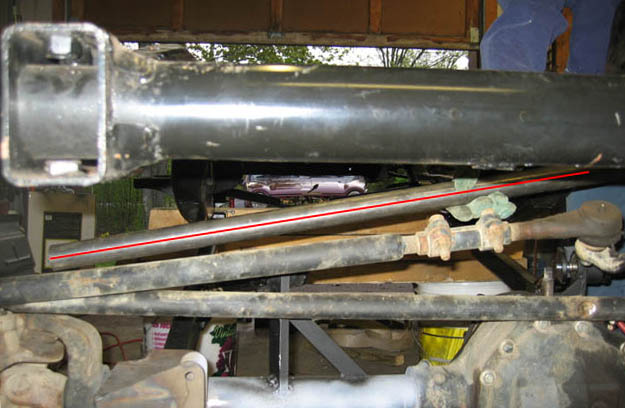
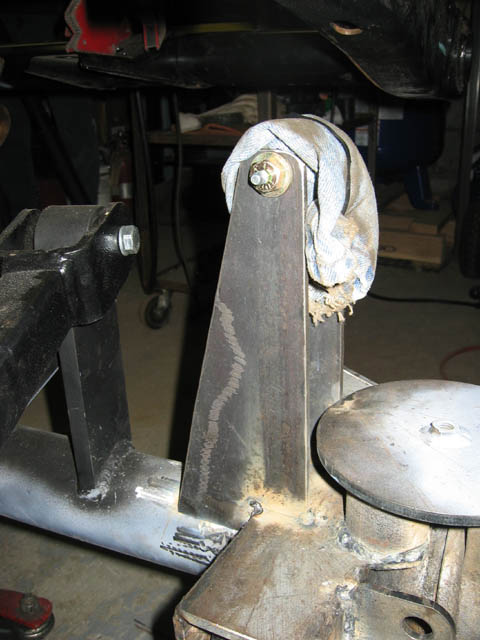
I had to build an axle end bracket. I started with 1/4" x 4" steel plate, cut it at a long angle, and made 2 pieces that I tack welded together. This way all cuts and drilling will be identical. Part of the bracket will be on the axle tube, then I cut a notch to go over on the suspension bracket. I drilled the track bar mounting hole and seperated the brackets. Using the provided Johnny joint center piece with a washer for spacing, I bolted the 2 plates together tight and straight, and covered the joint with a rag to protect it. I placed the brackets on the axle where I wanted it and tacked them in place.
At the frame end, I re-drilled the provided bracket to raise the bar, then welded it in place. I added some 1/4"x1" ribbing on the inside of the frame for extra strenght.
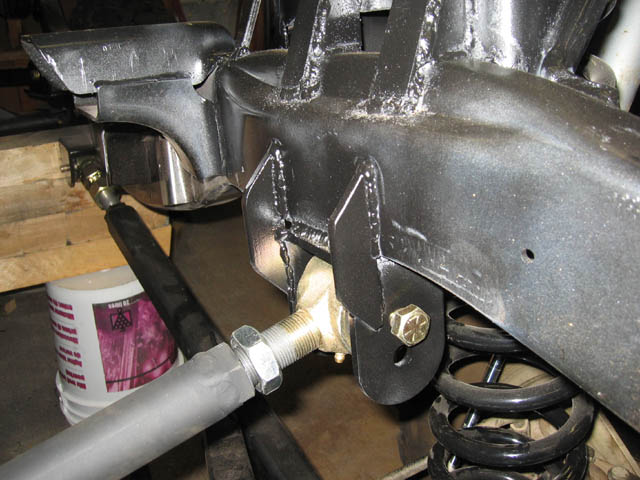
I added 1/4"x2" bar to fit in between the axle brackets and attach to the upper arm mount which has it's own bar angled to the axle tube, providing each other strenght.
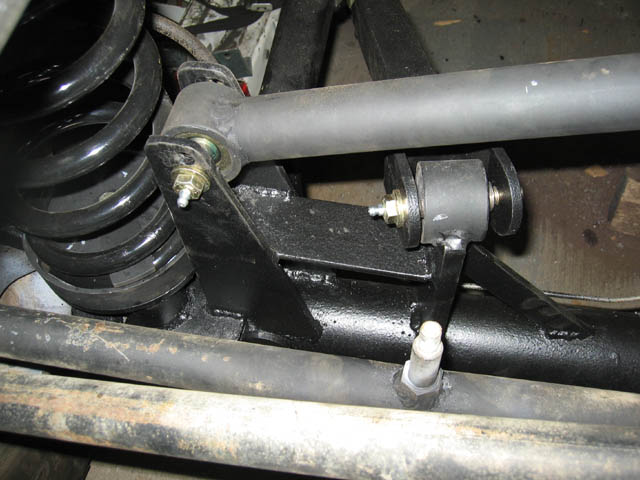
If you look closely at the picture above, you'll notice that I had to move the trac bar down. I did measure twice, even 3 times, but I didn't measure with the joint in place which ended up hitting the spring. I had to move it inwards to clear the spring, and down to have enough bracket steel left for strenght. [I later noticed that the track bar hits the upper radius arm, check here for fix.]
Day 16
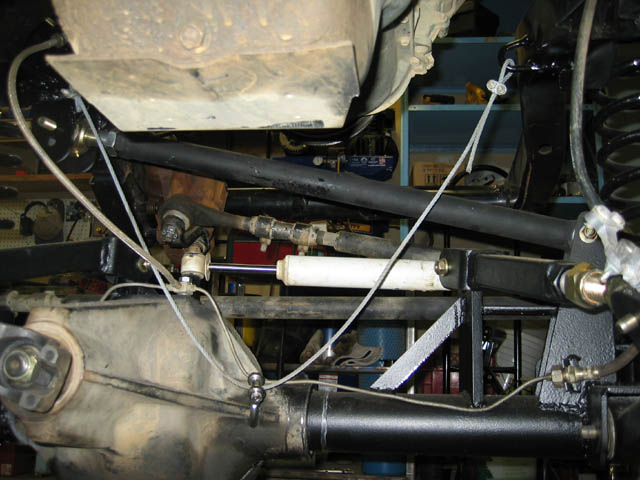
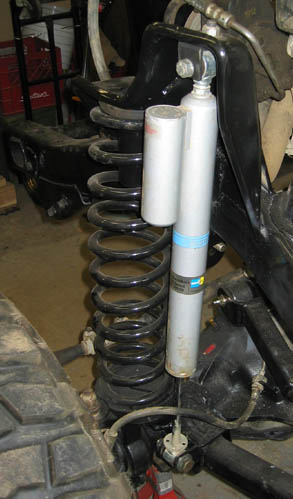
I painted the axle and put the brakes back on. Then it finally got installed to the frame, with the steering, coils, and shocks. All that's missing now is bump stops and a limiting strap which will get done later.
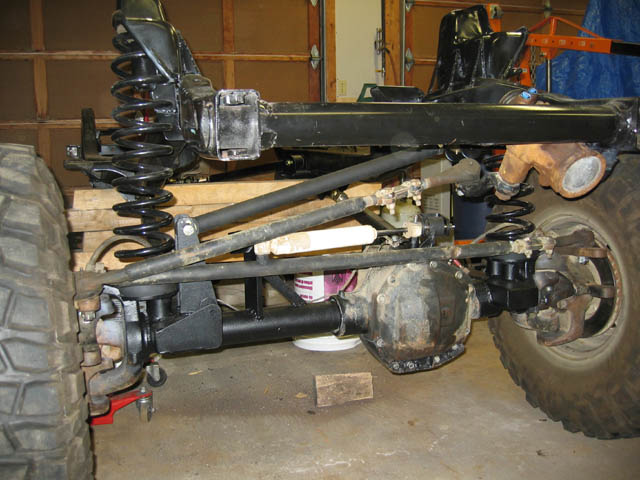
The steering box on the TJ frame is 3/4" closer to the driver's side than on the YJ frame. I had to lenghten the drag link by the same amount. I also noted that the Durango steering box has less travel than the YJ box, I measured 7/8" less end to end travel at the joint. I'm not going to do anything about it now, but it's something to keep in mind.
For the rear upper shock mounts, Clayton instructs to cut a big hole in the frame and insert the provided 3/16" C channel. This places the shock behind the axle and as far outside as possible, while keeping distance from the tire. I'd guess that with full width axles this wouldn't be necessary.
Clayton provides both a measurement and a template to place the first cut. Then it's just a few measurements to complete it. I used a sawz-all to start the top corners, followed by a jig saw for the sides and top, and a cutting wheel on the bottom.
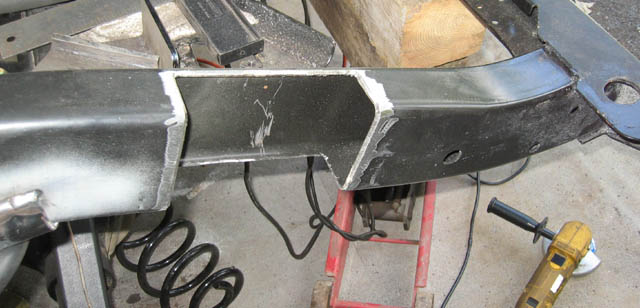
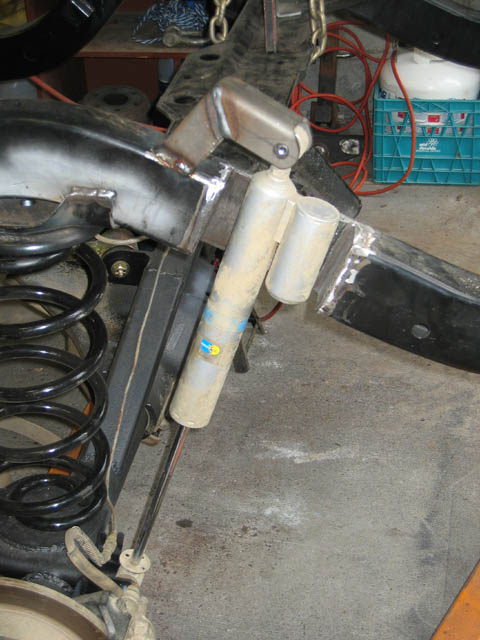
Since my Bilstein 5150 shocks have attached reservoirs, I had to extend the C channel and the by 2". I welded the seperated C channel and 1/4" bar pieces to the frame first to ensure best fit, then to each other.
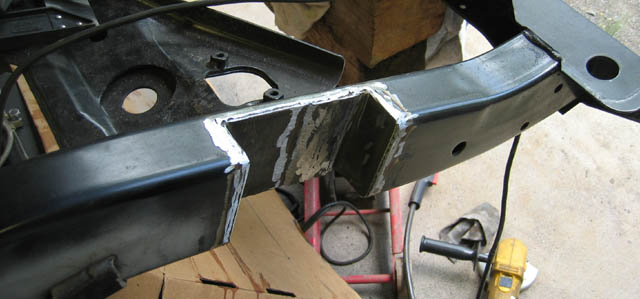
The upper mount comes fairly long, I had to cut 3" off to keep my shocks from limiting droop. Then it was welded on to the frame.
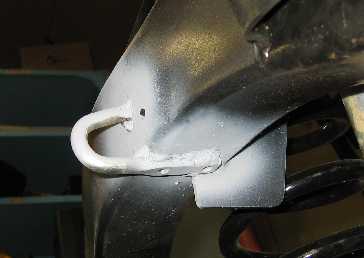
I made a front limiting "strap" out of 1/4" steel cable. I welded J brackets found at the hardware store to either frame rail, and drilled a hole in the diff's webbing. I strung the cable between the 2 J brackets and through a small D shackle attached to the hole in the diff. The D shackle will let the cable slide easier instead of binding, and it keeps the cable further away from the ground. This limiting cable is also adjustable.
