You are using an out of date browser. It may not display this or other websites correctly.
You should upgrade or use an alternative browser.
You should upgrade or use an alternative browser.
Repair and Replace 90's YJ
- Thread starter dougiet
- Start date
dougiet
Well-known member
Found missing drum brake parts, E brake lever, and brake struts.
Brake struts fit between the shoes with small springs on each end.
E brake levers are where the E brake cable attaches to and clips on the shoe to expand the shoes when the brake cable is pulled.
These items are not available at Benson's or in most parts books after having the parts guy look.
Scarp yards are a sure bet.
I received these parts from a fellow forum member at 'Wrangler Forums'.
I still have horseshoes up my fanny at times!
dougiet
Well-known member
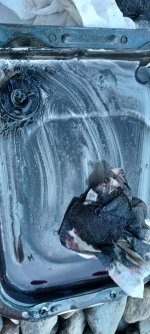
Have been driving the jeep around the block. It was best to change out the tranny oil and filter and drained TC case twice. The hesitation under throttle is gone and drives smooth quiet shifts more so as she warms up to operating temperature. This jeep did not run when purchased and is turning out to be work but not overhaul. The driveline is up to speed and will work on other parts as the summer comes to get certified.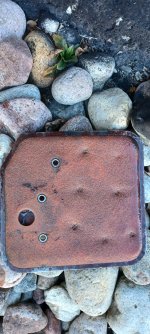


dougiet
Well-known member
When it comes to the Torque Flight 999 3 sd tranny with O.D. I notice the kick down linkage moves with the throttle in any position yet I have not felt the O.D. kick in when giving 3/4 throttle?
There are a few wires plugged into the tranny which might not be hooked up under the dash somewhere?
This tranny does not have a sensor at the flywheel.
This is the linkage at the carb.
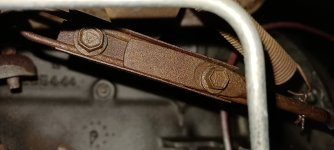
Tthese are the wires and the OD link on top of the shift cable.
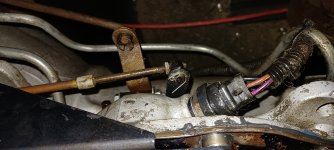
There are a few wires plugged into the tranny which might not be hooked up under the dash somewhere?
This tranny does not have a sensor at the flywheel.
This is the linkage at the carb.

Tthese are the wires and the OD link on top of the shift cable.

Last edited:
When it comes to the Torque Flight 999 3 sd tranny with O.D. I notice the kick down linkage moves with the throttle in any position yet I have not felt the O.D. kick in when giving 3/4 throttle?
There are a few wires plugged into the tranny which might not be hooked up under the dash somewhere?
This tranny does not have a sensor at the flywheel.
I didn't think that there was a 4-speed/OD auto trans in the YJ/TJ's? Or when you say "OD kick in", do you mean convertor lockup?
dougiet
Well-known member
Kunker, you are on to something there cuz you can't fix stupid."OD kick in", do you mean convertor lockup?
Ok, this is a converter thing, This is good news, nothing to be fixed here!
The Impeller and Turbine transfer fluid between each other to drive the Input Shaft of the transmission. The Stator gives proper direction to the fluid flowing between the impeller and turbine. The converter hub has slots that engage the tabs on the inner rotor of the oil pump to create oil pressure and oil flow from the pump while the engine is running.
The overall purpose of the torque converter is to:
- Provide a coupling between the engine and transmission
- Supply a method of driving the transmission oil pump
- Provide a unit that incorporates a flywheel for starting
- Supply a multiplication of engine torque of approximately 2.2:1 at low speeds and 1:1 at higher speeds
dougiet
Well-known member
I found this post about the rod being a shift point adjustment.
If the "kickdown" linkage (which controls upshifts as well as downshifts) is set too "loose", this will occur:
(1) The TF999 won't automatically downshift when you really depress the throttle, or it will take a very heavy "stab" at the throttle to get it to downshift; and (2) The TF999 will upshift too soon, and if really loose, you willl be in 3rd gear already before you get across the intersection.
If the kickdown linkage is set too tight, this will occur:
(1) The TF999 will downshift way before you want it to, sometimes just a little depression of the throttle (to increase road speed a little) will cause a fairly violent downshift that can cause problems if you're on a slippery or icey surface; and (2) The TF999 will upshift way too late, and if really bad, you'll have to get it up to 45 mph and then lift your foot completely off of the throttle to get it to upshift to 3rd gear.
So, to start off with, adjust the linkage so that just the "slop" is taken out of the linkage. Remember, there is a spring inside the tranny, so don't adjust the linkage so tight that you're pulling against the spring. After that initial adjustment, wrap a small piece of masking tape around each part of the linkage. then measure the distance between the two pieces of tape, and record the measurement.
Then test drive the vehicle. If your driving symptoms are such that you need to make the linkage tighter, stop and adjust the linkage so that the distance between the two pieces of tape is less. Only change he adjustment about 1/8-inch at a time. If you need to make the linkage looser, adjust the linkage so that there is more distance between the pieces of tape. Each time you adjust it, record the symptoms and the measurements.
Keep adjusting and test driving. It will usually take about 3 or 4 adjustments until you get an adjustment that you can live with. If you're really finiky, it may take 8 or 10 adjustments.
Also, keep in mind that extensive operation with the linkage set way too "tight" can cause internal damage to the tranny. So if it seems too tight, don't push it -- stop and re-adjust it as soon as you can.
dougiet
Well-known member
Well, I made a small 1/4 inch adjustment of the lever forward and the tranny shifted smooth, quicker, and could say a passing rev occurred.
I then moved the lever forward the rest of the way shifting was longer, heavier, and it felt top-end speed would be the result.
I cannot drive faster than 55 k's in the residential streets of the neighborhood until the Jeep is licensed and get out on the roads.
There are the tire size and gear ratios to consider when making adjustments and it is possible to find that sweet spot.
I do realize the tire size of 33s to 31s should assist the tranny and be easier on it.
I am sure that the adjustment procedure in the above discussion is correct and does work.
dougiet
Well-known member
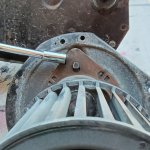
Removed the heater box to replace the core and find why there is a rough sound from the fan. Fan noise sounds like bearing noise, but it was the fan rubbing on the motor frame which was an easy fix.
The heater core was leaking a small amount of coolant I noticed but the motor did not run when I bought the jeep. I removed the hoses to the core when I did try to run the engine for the first time. I figured the core was done from age and needed replacement.
When I removed the heater box real easy there were no control cables from the temp selector on the dash to the box to control airflow direction or heat range, the previous owner or someone else at some point drilled a 2-inch screw into the heater box to hold the air control lever to defrost and used tie straps for another quick fix for the temp range instead of buying the control cables.
Well you can't fix stupid they say and when I opened up the heater box the 2-inch screw was drilled straight into the heater core and thus someone was now an idiot.
I plan to solider the hole on this factory core because it is bigger than some replacement cores which gives off more heat.
The heater box is now painted and waiting for the core fix to go back in.
The base of the fan was rubbing off the metal piece of the motor frame causing a noise.
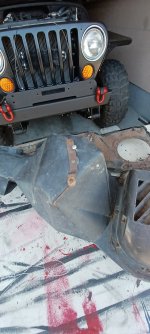
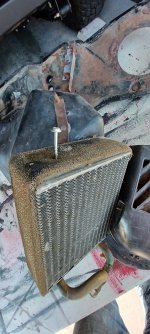
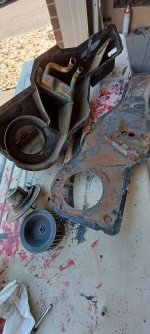


Well you can't fix stupid they say and when I opened up the heater box the 2-inch screw was drilled straight into the heater core and thus someone was now an idiot.
My confidence in my ability to solder a heater core is low enough that it'd just get replaced in most vehicles as they are usually a pain to get to. If it's that easy, I'd probably give it a try more as a cost savings than a concern about heat output. Mostly because my Jeep would be garaged for the winter, and I already tore the entire heater unit out to make room.
dougiet
Well-known member
I would like to remove the heater box too but it is required for certification. I am not going to drive the jeep past October and gas at $2.00 I am going back and forth on the driveway of the house!
Dominion Rad and one other shop in all of the Ottawa area thus far will soldier this hole. I called 4 auto shops in Stittsville and Kanata SOL.
If only I was there to hear and see the look on the face of a newly formed idiot who drilled in the screw! HACKER
Dominion Rad and one other shop in all of the Ottawa area thus far will soldier this hole. I called 4 auto shops in Stittsville and Kanata SOL.
If only I was there to hear and see the look on the face of a newly formed idiot who drilled in the screw! HACKER
dougiet
Well-known member
The heater core has been soldered, and the hole box painted and installed in the jeep.
The fan works at 2 speeds.
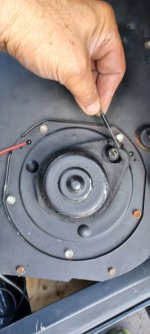
FYI about the screw hole sequence of the fan to the heater box. The fan must be screwed onto the heat box one way only. You must see the indents on the box cover in the screw holes of the fan, if not the fan power terminal will not get through the firewall and be misaligned. The fan can be screwed on without seeing these indents, that's NFG.

Last edited:
dougiet
Well-known member
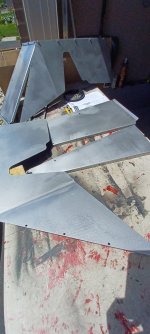
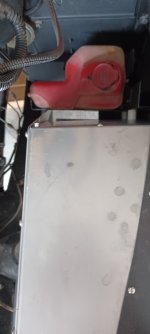
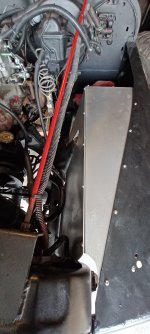
Was able to install the Poison Spyder Defender inner fender kit for YJ's
The 3 cut aluminum pieces are thick gauge with pre-drilled holes including all the stainless hardware.
Instructions are clear and if necessary custom fitting the fender is real easy and forgiving to work with.
If you need inners for your flats, I recommend this kit.
link Inners
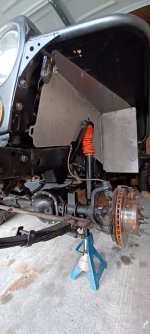
The 3 cut aluminum pieces are thick gauge with pre-drilled holes including all the stainless hardware.
Instructions are clear and if necessary custom fitting the fender is real easy and forgiving to work with.
If you need inners for your flats, I recommend this kit.
link Inners


