Project -XJ Evolution

dwcjwerfner

Well-known member
Club Member
Alright, well I have done lots of cutting and welding but have been to busy to post any of it.
To start off a big thanks to Matt, Scott and my Dad for their help as I would never have got done at all without them. (yeah and I was 3 days late to Lingham anyway)

So the cutting:


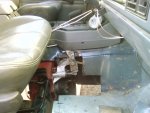
I only cut one side off in the first place so I would have a reference for the first side. I picked an arbitrary point in the centre of the truck to base my calculations for the Bend-Tech program and then used a level and screws in the old body to determine the line I wanted the tube to follow. Yes I was told I was being to complicated but I want people to look at this when I am done and say: "Hey that is a Cherokee", everybody had their nutjob visions and that is mine.


Alright the cutting begins


And the bending. I left the blurry picture of me bending as it seems to be a precursor to how my learning curve with bending will go.


So I bend my first piece of tube (besides some inner fender hoops I made so that I "understood" :lmao: the bender and to calibrate it.
Note that the tube on the top is bent at the totally wrong place. Thought I saw a mark, missed the other mark, shouldn't do winter projects in a rush in 1 week and stay up every night past 1 and some nights 3 and 4 am. Whatever I screwed up.


So after losing my mind over such a waste of DOM I sat down and calculated where I could use pretty well every piece of it for other parts of the cage in fenders front and rear and braces etc.
Then I bent a new piece. Note to self do not leave other similar types of tube lying around when you are tired and in a rush or you will pick it up and bend it. That is why it is a different colour, not that much of a different colour but enough. Also when Scott pointed out that it had a seam on the inside and I noticed it bent different in the bender (1.66 pipe compared to 1.75 Dom DOH!!!)
Also note that both bottom legs of the hoop are pointed to the left whereas they should both be pointed in (1 left, 1 right) which will come back to haunt me later.


Matt came back out to help me again and cut the rest of the back off and we also removed the rear "crossmember" and put my bumper in it's place which gained me 4 inches on departure and much more strength across the back of the truck.


The pile in front was what the back of a Cherokee looks like when it is cut off and the pile of dirt and rust (which looks much bigger in real life) is what fell off the XJ when it was cut apart


At this point I had temporarily abandoned the hoop as I was "thinking" about what to do.
Scott came out and we bent up one of the sides which were "harder" :banghead: to do which is why I did the hoop in the first place.


So what I ended up doing was cutting the first messed up hoop just above the problem area.


Then bent a new piece using the (incorrect) 1.66" pipe as a template. :pissed:


To ensure that the joint was strong I sleeved it with 1.50" DOM 1 inch inside of each pipe with 1/2" showing for a good weld so the joints are actually the strongest points lol.


More later I have to go work on the Bus for NH so more so I can work on the truck for Chertsey. That was my lunch break lol.

dj
 

badcompany

Well-known member
Club Member
also waiting on updated.
and i have to say " dam you " now i feel like chopping my xj up. lol.
actually can you post a couple more pics of the dana 300 pass side set up.
im thinking of going that way.
thanks. and any advise on that set up would be appricated , thanks.
 

dwcjwerfner

Well-known member
Club Member
Dwayne, any updates?

also waiting on updated.
and i have to say " dam you " now i feel like chopping my xj up. lol.
actually can you post a couple more pics of the dana 300 pass side set up.
im thinking of going that way.
thanks. and any advise on that set up would be appricated , thanks.

Hey guys sorry was busy getting ready for Nascar and just got back early this morning, I will get a bunch posted up tonight.

Dwayne
 

dwcjwerfner

Well-known member
Club Member
Alright so I should have just posted these up before but I was waiting for photobucket and then I had to go.

Here is the drivers side that got it's own cut and piece welded it in because BendTech kept telling me to rotate the tube 13 degrees the wrong way, the demonstration showed the right way but the instructions were wrong (thanks Scott for seeing what it was doing)


The passenger side is right, and as you can see my fancy bends to make the tube try and match the existing body lines are pretty cool but took alot longer to do and really doing bends opposite ways close together is not something I would recommend if you want to retain sanity :lmao:
But I would have to say knowing where I am going with fenders and skin that I do think the effort will be worth the final result


Some shots from the drivers side


Rear Shots


And as you can see by the last pic that the 2 bottom uprights on the D-pillar both going left as I mentioned before really mess things up. I will have to cut the welds back off and rebend one of the left tube bends another 7 degrees
 

dwcjwerfner

Well-known member
Club Member
thats some diet the XJ is on...

Hey Buddy
Yeah it is actually too light on the back right now, the plan is to close it back in though and have storage so I am actually going to get it on the scales before and during to make sure I end up with the truck fairly balanced.

dj
 

dwcjwerfner

Well-known member
Club Member
also waiting on updated.
and i have to say " dam you " now i feel like chopping my xj up. lol.
actually can you post a couple more pics of the dana 300 pass side set up.
im thinking of going that way.
thanks. and any advise on that set up would be appricated , thanks.

Hey Farook
I will get you some pics when I pull the tranny cover off again. I guess you noticed we are not going to Chertsey but are you coming to Lingham? It is way closer for you and tons of fun, lot's of stuff for you to find there with the Cherokee.

Dwayne
 

badcompany

Well-known member
Club Member
you've inspired me. dam you again. lol.
im in the process of changing a couple of things on my cherokee.
this is definatly not a thread hi jack but hears a pic of whats going on
 

Attachments

  • 0920101823-01..jpg
    0920101823-01..jpg
    96.9 KB · Views: 28

dwcjwerfner

Well-known member
Club Member
you've inspired me. dam you again. lol.
im in the process of changing a couple of things on my cherokee.
this is definatly not a thread hi jack but hears a pic of whats going on

Yep that is where I started and then ending up cutting the whole tunnel out and building a new one as a I have a doubler in there and wanted full access from the top.

dj
 

dwcjwerfner

Well-known member
Club Member
Yeah Marek I am, was actually planning on doing that first to get practice bending lol but when I found the bad parts on the back of the truck I jumped right in there. I also have to figure out what I am doing exactly for front protection around the windshield, whether I am staying on the outside or coming from the inside out which I will probably do as it seems it will probably be stronger.

dj
 

dwcjwerfner

Well-known member
Club Member
Alright I broke a Nitro stub shaft on the weekend. I was being pretty hard on the truck (WOT) and I guess I was getting a bit of a bounce trying to get up onto a bit of a ledge :rolleyes: as actually Justin had just commented to his brother that I seemed to be driving my truck a bit harder.


I wasn't really happy with the look of the metal in those shafts and so when I emailed Chase at http://eastcoastgearsupply.com/ for a replacement under warranty I mentioned the fact and this is what he emailed back first thing this morning.

The heat treat does not look great but not terrible either, I have some
American stubs we had done recently to combine with our kits. We just broke
a bunch of shafts to test strengths and what not and this is what I have
found. Spicer ujoints or stub break first....... if you have uprgraded to
300m ujoints then stubs start breaking. Inner 44 break at 5200-5800 lbs
stubs break at 3800-4200. our American stubs break at 5000-5500 so if you
want to upgrade to our American ones we can credit you the price of the
nitro stub towards are American stubs or we can send you a nitro
replacement. Upgrade to the American stub would be $50. Thanks, Chase

Chase Perry
East Coast Gear Supply
919-672-2705
www.eastcoastgearsupply.com

So I opted for the upgrade and would not hesitate to recommend Chase's business to anybody. He is not the absolute cheapest on the net but his customer service is top notch, (he even answers the phone in the evening) including just shipping me the stubs both times and letting me ship the broken ones back when I pick up the new ones in Ogdensburg.

dj
 

mucovich

Till Valhalla!
hmmm, good to know, i just ordered a set of CTM u-joints so i just made my stubs the weak link. I've never dealt with east coast gear supply, i'll check em out.
 

dwcjwerfner

Well-known member
Club Member
also waiting on updated.
and i have to say " dam you " now i feel like chopping my xj up. lol.
actually can you post a couple more pics of the dana 300 pass side set up.
im thinking of going that way.
thanks. and any advise on that set up would be appricated , thanks.

Hey Farook
Sorry I took so long to get pics, I thought I had some half decent ones in my build but apparently I really don't have any.
My first cut was very similar to yours and I think I forced Dirk against his will to make me this cover so I could go wheeling and ran it for part of last year.


Then sometime over last summer I cut the whole thing out, ummmmm because I saw it somewhere and I wanted to add strength to the unibody but mostly for easy access as I kept breaking my 231 doubler so I am able to remove both transfer cases as one unit from the top/side. You can actually see where I trimmed the angle iron to be able twist the whole thing out as I kept almost losing my fingers when I had to put it on weird angles to try and get it out. I am going to raise the back of the tunnel too when I put in a new crossmember for the seats and 5-point.


It is really wide especially on the passenger side and I had to redo the mounting points and put 1-2" bar under the seat to get attached to the floor. It made the seat fairly high but I have power seats so I able to squish it back down close to proper height but tall people don't really like sitting over there.
What axle are you using? And where is your build on here :p
I put the D300 on the passenger side just because I didn't want to deal with it upside down (leaks which a D300 always seems to do anyway apparently) and I just wanted shift levers and not cables.
Which of course had be pulling tubes out of the HP D44 Ford. I would never do that again, I would cut and sleeve the tubes instead.

Dwayne
 

badcompany

Well-known member
Club Member
thanks for taking time to post thoes pics up.
im using a 78 fsj dana 44 pass drop going to be leaf sprung
and of course d300 t case.
kind of wresteling with steering right now so ill definatly post up the whole build hear if you guys want its on jeepkings(do i get banned for saying that):smokin:
 
D

Dirk

Guest
lol...yeah, i recognize that cover....
on the second pics I spy a new shiney part...how far are you witht e rear link? Really considering that setup myself.
 

dwcjwerfner

Well-known member
Club Member
lol...yeah, i recognize that cover....
on the second pics I spy a new shiney part...how far are you witht e rear link? Really considering that setup myself.

Hmm.....I took the pictures so I thought nothing showed, I didn't notice the 1-link showing, yeah I am working on it maybe since your eagle eyes let the cat out of the bag lol I will post up some pics tonight. I am wrestling with how much breakover I am going to lose vs departure angle vs anti-squat.

dj
 
D

Dirk

Guest
DOH...sorry buddy...:banghead:

I do have some ideas tho about the setup. :)
 

dwcjwerfner

Well-known member
Club Member
That's Ok Dirk actually when I should have looked at the pictures more closely and realized the 1-Link was sitting in plain view :lmao:

So I bought the 1-Link in April because I figured it was a fast way to link my rear and I would have it in by Rausch Creek or Spring Fever by the latest :p
But between everything else I did to the truck and LIFE and the wife's Daytona :banghead: and work needed on the Bus I never got to it and figured I would live through this year without it. The problem is now that I am able to beat on the t-cases and have a healthy engine I keep breaking rear u-joints, abusing the front end and the the rest of the truck because of my horrible axle wrap (those of you that have seen it bend a leaf 90` know what I mean) . I even managed to easily bend a leaf pack with a 3/4 ton leaf in it concave last time I was out. :eek:

So Sunday afternoon the cutting began and my parents were by for my mom's birthday so dad had to take a picture of me in my "Flintstone" truck.


So I cut basically everything out of the center of the floor


Then started playing/calculating where the link needs to go. From my research most trucks with the 1-Link usually seem to be full-size and I am understanding why......you need a lot of distance to deal with the anti-squat. My link will probably end up all the way forward under the D300


On a side note I am always amazed at how much "energy" is stored in bent metal, these are shots of what happened to the 2x4 tube when I cut a piece out of it with the plasma.


dj
 
Top