Project -XJ Evolution

dwcjwerfner

Well-known member
Club Member
Well I have been slowly trying to find and then sort pictures to photobucket as I have spent enough hours building this rig and it's performance last year was even more than I had hoped for a budget build so I guess should show "her makings" off a bit and as a reference for others.
A little history: I bought this truck about 5 years ago as I always liked the style and I had always owned S10 Blazers and wanted something different. I immediately bought a set of 30" AT's and thought I had quite...
Please login to view full content. Log in or register now.
 

Richard

Commoner
Club Member
Great write-up Dwayne, it's nice to see a build that new people can use as a reference.
 

dwcjwerfner

Well-known member
Club Member
Well one of the things I was supposed to have done before I ever went on any runs was have proper bumpers, tire carrier and sliders installed. It took alot longer than anticipated as I ordered them from JCR Offroad (http://www.jcroffroad.com/) who do make a good product at a good price but man they are not good at keep delivery dates. They originally had told me in the start of April that that it would be 13-17 working days or so which was going to leave me tight in time for Spring Fever. Ha! Anyway after getting very irate with them on the phone especially at that point it been 30 working days and being told I was still "1 work week from being shipped" and I could not cancel even though mine were not built it would turn out that really they are just some good guys that can't keep up with there success and that is typical of small operations. They did refund me my shipping so at least I saved $120 for my aggravation and we were still friends. Then good old UPS managed to "break" the nut on the tire carrier.
Anyway here are some pictures of them arriving:


Cleaning up the old bumpers and brackets with the shiny new Miller Plasma my wife let me have :) too.


Mocking up the bumper and primerd.


And some pictures of it on the truck.


Dwayne
:beer:
 
Last edited:

dwcjwerfner

Well-known member
Club Member
Rear Discs

So after being out for a couple of runs and figuring out what more the truck needed one thing became very apparent which I knew from reading but experiencing is believing. Cherokee brakes SUCK!! It took both feet and both hands pulling on the steering wheel to stop the truck on the big rock at The Gorge.


So I spent way too much money because I wanted it right now and bought a complete bent Grand Cherokee axle with disc brakes from Union for $340 which would have been an ok deal except for all the inner parking brake parts were complete scrap and I was too busy to ever take the bad parts back and demand some money back. So by the time I bought new spring combi kits discs and parking brake shoes I was $500 into it. And you know what at that much money it was still actually worth it to just be able to stop without worry.
Here is a nicely detailed link on how to do this: http://www.geocities.com/dcpaschal/mitch.html

The donor axle:


Old brakes and backing plate removed and disc backing plate installed


Disc in place


Some pictures of the bracket I made for the brake lines and the end cut off the ZJ cables and welded onto my XJ cables


With the wheel installed
 
Last edited:
D

Dirk

Guest
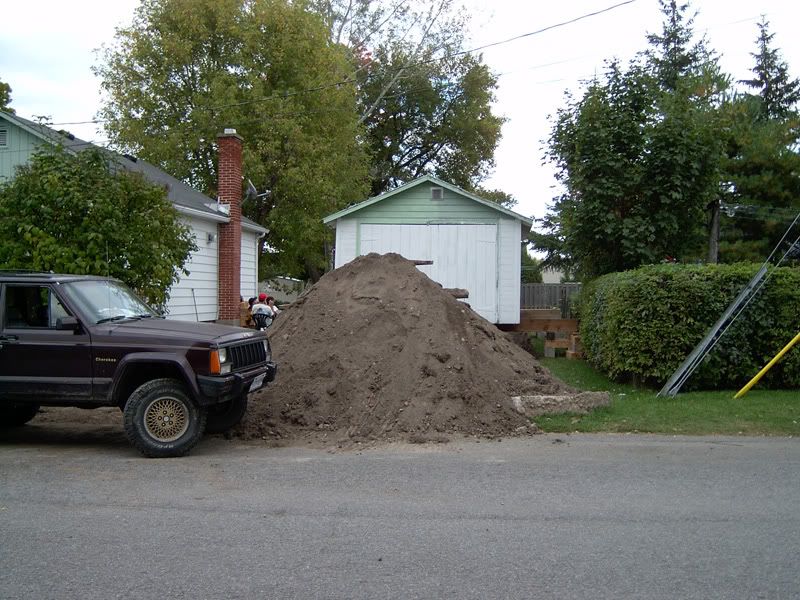
And an early pic.....

I think its actually afraid of that dirt pile. :flipoff:
 
D

Dirk

Guest
get working on this thread, I want to see the axle build part. :smokin:
 

dwcjwerfner

Well-known member
Club Member
Although the truck handled very good offroad it seemed that whenever I got back on road everything was always bit off-kilter so I installed a Lower Control Arm (LCA) Drop Kit and an adjustable Track Bar.
http://www.roughcountry.com/jeep_xj_control_arm_drop.html
If anybody is wondering whether the LCA Kit is worth it I would say absolutely and especially on DD's. A question I researched before buying mine was whether or not the lower position of the mounts was a problem off road with getting hung up on obstacles and I would say no, they are fairly close to the wheels and any obstacle there will be rubbing on the lower control arm. One thing I did notice though is that I had more "damage" (dents, scrapes) to my LCA's since I had put them on, but that is probably also do to my increasingly aggressive driving style as I accomplish more things I need to get the truck to where I want it. Besides I had never dented the LCA prior to the kit but I also just noticed a 6" long 1/2" deep dent on the "big" part of my unibody frame lol. Good thing I am plating that.

Before with axle sitting on a jack

After install sitting on tires

Parts and then installed


What you do to pull the axle in place when you are too lazy to undo all the steering linkages, in hindsight, undo the linkages.

New Trackbar


Dwayne
:beer:
 
Last edited:
R

Root Moose

Guest
Interesting. First time I've seen the RCX version. FWIW, the RE version has a longer brace that terminates nearer the transfer case cross member and has a more gradual slope to it.

I don't know if it makes much difference, just throwing that out there.
 

dwcjwerfner

Well-known member
Club Member
I actually don't run the shim anymore but I had it drilled and the pin went all the way through it and yes that block is deceiving it is a one piece factory deal not sure why they made it looks like two pieces. I checked that right away when I first got the truck back myself. That pic is actually from last June and it ran fine all summer and fall until I put the D44 in and mounted new perches with correct angle.
Dwayne
:beer:
 

dwcjwerfner

Well-known member
Club Member
Ok let's try to get this up to current status.
So last fall Dirk and I took a drive one day to Barrie, Oshawa and then
Whitby to pickup 5 used 36" Iroks on rims, 5 15" aluminum rims, 4 16.5" rims with tires and a D44 with a traction bar on it and was the Excursion ever full.

Anyway I installed the D44 which was in a YJ so I had to cut off the perches and install new ones which I bought at Chrysler and that is by far the cheapest place I found to buy them and set a correct pinion angle.
Sorry no pictures of the work but here it is with everything installed.


Dwayne
:smokin:
 

dwcjwerfner

Well-known member
Club Member
Alright now let's move onto what I am currently doing. So after breaking my D30 shafts twice in the winter the decision to build a D44 was made.

I used parts from 3 axles to make it the one axle I wanted which was a HP passenger side drop XJ width D44.

1st Axle was a Chev D44 which I bought for the good warn outers and ended up deciding to use the tubes from it which were 3" x 7/16" and that way I already had the inner knuckles pointing the right way.


Cutting the Chev axle tubes:


Just one of the "dangers" of working with Dirk in the garage:


2nd I got a HP Ford D44


Next I bought Alloy Axles to fit a 70's Waggy front end.
I got them all from Chase at http://eastcoastgearsupply.com/ who was very knowledgeable and had the best pricing for the axles I could find anywhere. The only thing I didn't like was that he didn't tell me that although he is in NC that he ships directly from manufacturer which is in WA which took 4 days longer than I expected.


Chev tubes cut to the right size and bored for inner seals.


This is the Chev tubes installed into the Ford carrier housing.


Slight technical difficutly, don't try to press a tube into the housing without bracing even if there is only 1.25" left to go. So I drove to Kaladar and started all over again with a new housing except this time it was only a 1/2 ton housing.


Ok as you can see we made the decision to pull the tubes out of the carrier housings, make sure they were right length and then reinsert them instead of cutting and sleeving them. If I were to do it all again I would probably cut and sleeve as I only accomplished all of this without to much pain and cash outlay as one of my customers is a metal fabrication shop who have an "arc-air" which makes fast work of the hardened rosette welds. But this does look better. :D

Dwayne
:beer:
 
Last edited:

dwcjwerfner

Well-known member
Club Member
Ok since I am putting in the new axle and I will need to build coil buckets, control arm mounts, shock mounts, trackbar mount and gusseting I said what the hell I might as well long arm it too.
Well that and the fact that I bought this D300 (hence the passenger side drop axle):


Well actually it was really because of this 231 "Fox-Box" crawl box which is going to create enough torque that I needed to make a real crossmember and reinforce my "stamped unibody frame":


So since I am going to have a "real" crossmember then it is not really that much more work to put on long arms.

The tunnel before:


The "frame" rail before


The hole for the D300:


Stiffener for the frame, oh yeah I have alot of welding to do:


Dwayne :smokin:
 

dwcjwerfner

Well-known member
Club Member
Bumper modifications

Ok so when I ordered my bumpers from JCR I did so with receivers installed on both front and rear as it was always one of the "cool/necessary" things to have a winch that could be switched front to back (as having one on both ends is fairly pricey) in order to extract yourself back out of the mess you got yourself into. Well the reality after our first year of wheeling was that winches that are capable of doing that stick out alot and are in the way for crawling and even negotiating tight trails and therefore also very prone to getting damage. Besides that Dirk, Steve and I always have a winch so that leaves one of us at the back if a tug wont work.

This is what I dealt with in front of my truck all year.


Some good thick chunks of steel that Steve got from the scrap pile at work. Which he pointed out would definitely protect the bottom of my winch plate.


1/4" inch plate that I had cut and bent.


Painted


Oh yeah the "light" bar was useless as well as it was so low that I could not get the winch under it. So I cut it, added tube on both sides of the uprights, moved the old "center tube" up and welded it all back together.


I will post picture from the side later as the clearance gained is huge.
 

dwcjwerfner

Well-known member
Club Member
Onward with the D44 Front

So I got the rest of the 44 together and Dirk and I installed the new 4.88 gears and Lockrite locker


Now this picture does not make it look as good as it did in real life but they were so close centre that we didn't even want the waste the time taking bearings in and out trying to achieve a miniscule gain.


I had a bit of clearance problem with the alloys which are Waggy and the outers which are from the Chev that I fixed with the debur tool.


Mocked up from the side at full stuff


Mocked up from the front


Dwayne
:beer:
 

dwcjwerfner

Well-known member
Club Member
Ok now we are getting somewhere :D

I picked up 3/4" Heims from Ruff Stuff (http://www.ruffstuffspecialties.com/catalog/index.php who I found on Pirate and have prices that are too cheap not to buy) last Saturday when it arrived in Ogdensburg.


Here is the transfer case / Lower Control Arm (LCA) crossmember I made. It is a bit of overkill with the tube being 2"x4"x1/4" and the plate for the transfer case attachement point at 5/8".


Here is the 2"x1/4" LCAs with the bungs welded in.


Thanks Welderman.
 
Last edited:

dwcjwerfner

Well-known member
Club Member
Here are some shots with the LCA's attached and moving through some articulation


Some shots of it from underneath the truck with the crossmember in place and the LCAs attached


Also my best girl was getting a little "tired" of my truck so I branded it to show her that she is as important (mostly) as the truck. :lmao:


Some more articulation shots :D


Sitting on the springs so I could see where the natural postion will be for the mounts.


Not done, but looking the way it will when mounts and UCA are installed. Yes it the front axle will be about 3" forward from stock.


Dwayne
:beer:
 
Top