

|

|

|
You are using an out of date browser. It may not display this or other websites correctly.
You should upgrade or use an alternative browser.
You should upgrade or use an alternative browser.
231/Dana 300 Doubler Build
- Thread starter 2Greys
- Start date
http://www.thorboards.com/index.php?showtopic=5017&hl=
-New-Tera Low 4:1 low gear set for Dana 300, asking 400
As I don't think you did the 4:1 gears (it's been a long thread).
-New-Tera Low 4:1 low gear set for Dana 300, asking 400
As I don't think you did the 4:1 gears (it's been a long thread).
I didn't. Right now money is becoming quite tight with the unexpectedness of the AC Compressor going.
Thinking I won't trade in the Liberty but just sell it.
Thinking I won't trade in the Liberty but just sell it.
http://www.thorboards.com/index.php?showtopic=5017&hl=
-New-Tera Low 4:1 low gear set for Dana 300, asking 400
As I don't think you did the 4:1 gears (it's been a long thread).
Cool! How much higher will it put the seats?
None at all. The original bracket sweeps forward so it would have banged up with the restructured floor. The only solution to continue using the stock bracket would be to put it on spacers or build a new bracket. The seat will still slide forward and back but will not tumble anymore
So I need opinions on crossmember creation:
As mentioned before The big obstacle is the muffler sits about an inch in the skid and I don't think I have enough room to move it back but I have two ways of doing it (I think).
1. Crossmember outside skid and have it go from frame rail, drop 45*, run flush with the skid (or maybe a bit higher), climb back up and attach to other frame rail.
2. Start crossmember further up the frame rail running flat on the skid, notch the skid and then tube parallel and outside skid and then back in (or can I go straight across?) This is similar to what Tim B did with his.
All of the connections are going to be welded/clamped as the bushings mount to the crossmember right under the 300's output as I am using TMR's mount.
I am thinking #2 may be the best way to do it just not sure if I am missing something. This is also assuming I can find enough room between the skid and the muffler ( I think I can) and the right angle to do it.
Ideally the tube should be bent but I think I should be ok with notched and welded. Wish someone nearby had a bender..
Also I assume I should assemble from the output to the frame not the other way right?
Weather was hit and miss (ended up only sprinkling today) so I decided to get the inside nailed down. I got the seats and console back in. I did notice I made a mistake with the driver side bracket as I made it level when in reality the rear should be about an inch lower.
Once that was fixed it all went in. I will say removing and putting the driver side seat is a more difficult than the standard bracket.
Ratcheting wrench is mandatory
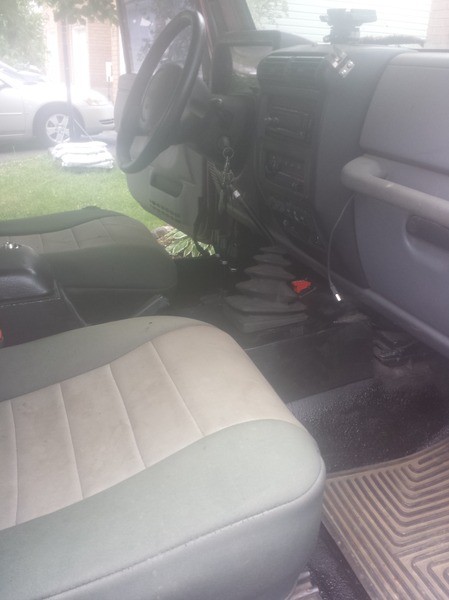


I need new seat covers but that will be next year
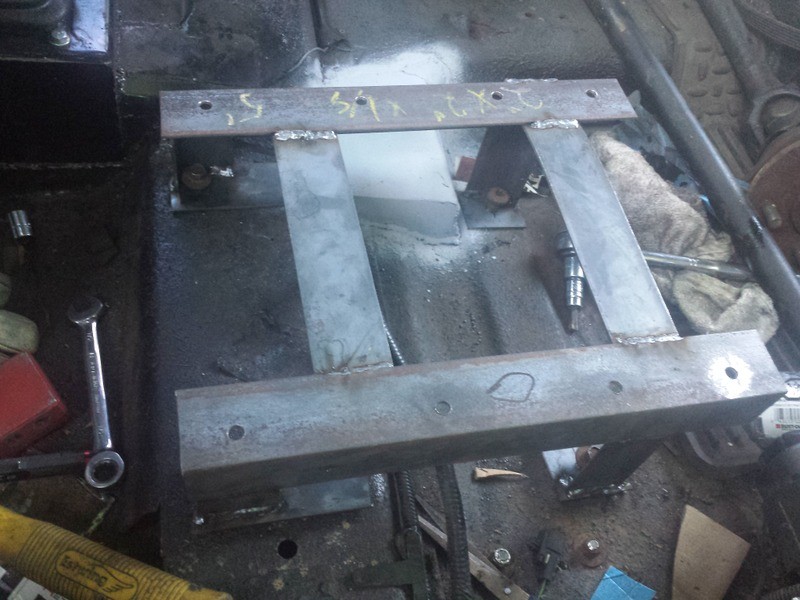
Here is what it looks like with both transfer cases mounted (need to touch up the paint). You can see the bracket and shift levers that are attached since the Dana 300 has been flipped.
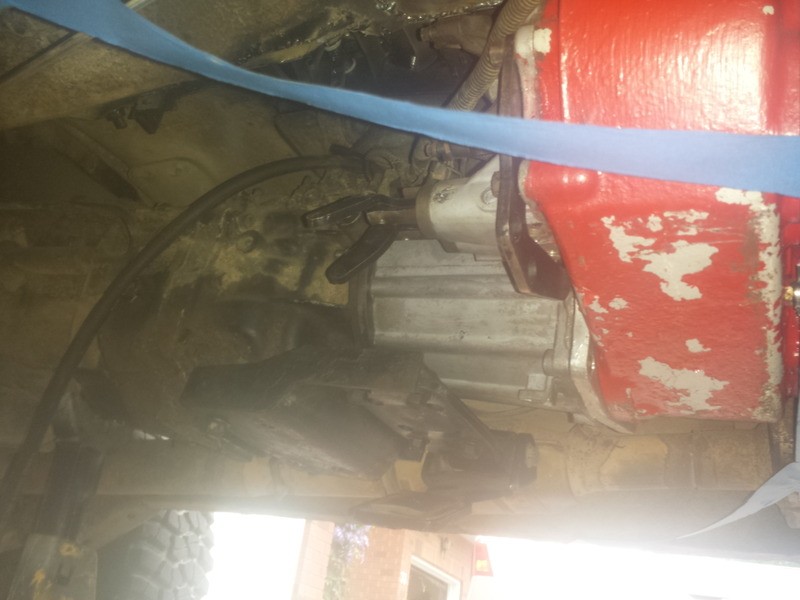
The blue tape in the picture above is initial placement for the rear crossmember. I was planning on having the bracket that the rear input is attached to behind (in relation to the front of the vehicle) but I am thinking it may be easier and cleaner to have the crossmember to go out a bit further and have the bracket in front of it. It removes having to be really close to the transfer case skid.
Once that was fixed it all went in. I will say removing and putting the driver side seat is a more difficult than the standard bracket.
Ratcheting wrench is mandatory
I need new seat covers but that will be next year
Here is what it looks like with both transfer cases mounted (need to touch up the paint). You can see the bracket and shift levers that are attached since the Dana 300 has been flipped.
The blue tape in the picture above is initial placement for the rear crossmember. I was planning on having the bracket that the rear input is attached to behind (in relation to the front of the vehicle) but I am thinking it may be easier and cleaner to have the crossmember to go out a bit further and have the bracket in front of it. It removes having to be really close to the transfer case skid.
Looking good Chris!
I have been thinking about that. 
It looks like I can go wide enough that I should be able to put the clamps close to the frame.
It looks like I can go wide enough that I should be able to put the clamps close to the frame.
Whatever design you decide for the crossmember make sure that it will allow for easy service/removal of the T-case in the future.
Actually I am starting to wonder if I am over thinking the crossmember.
I have a piece of 1.5"x.120 pipe that I was going to use as the crossmember with the clamps.
I was going to mount it on the inside wall of the frame going down on an angle and then run straight across
OR
Like Tim's Yello project in the following picture (Post #121 picture 1) the problem with me doing that is since my output is so half the distance out I have to deal with the skid plate location which due to the tuck and lo profile is pretty tight. His is a very small bend, mine would be a lot more and I would have to notch the skid which may undermine its structural integrity
DISREGARD BELOW (forgot about the muffler in the way)
I was thinking I could make it even simpler. Run a bar straight across attaching so it is flush with the skid thus reducing any potential sticking points. It would probably be about halfway through the diameter of the tube. So half would be under the frame rail and half would be on the wall. The bracket and bushing would then attach to that. I would also be able to attach the clamps very close to the frame which should minimize the lever action on the mounting at the frame. I was also planning on welding some plate on the inside wall (and maybe the bottom as well to reinforce the area. What gauge would suffice (1/8?, 3/16?) and how big of a piece (3x4?)
How does that sound? Any concerns?
Last edited:
R
ROUGHcrawl
Guest
Only lesson I've learned (the hard way) about t-case mounts is that ideally it has similar wiggle allowance as the motor. I had a lot of sheered t-case mounting bolts in my buggy V1, with stock motor mounts and poly bushing on the t-case member.
I have rubber throughout, I actually had to source rubber bushings as the ones from TMR that came with the mount are poly and they didn't know where to go. I contacted Brown Dog which is where I got my Motor Mount Lift and they had the ones I needed. Charged me $8 shipping included which isn't bad coming from the US.
The stock TJ is set up with the motor mounts going to the frame but the transmission mounts in the middle of the skid plate. To mimic that the soft points are going to be in the middle as well. Couple pages back and some discussions with Marek and Dwayne we came to the conclusion that should be the best way to do it.
The stock TJ is set up with the motor mounts going to the frame but the transmission mounts in the middle of the skid plate. To mimic that the soft points are going to be in the middle as well. Couple pages back and some discussions with Marek and Dwayne we came to the conclusion that should be the best way to do it.
Only lesson I've learned (the hard way) about t-case mounts is that ideally it has similar wiggle allowance as the motor. I had a lot of sheered t-case mounting bolts in my buggy V1, with stock motor mounts and poly bushing on the t-case member.
Okay, that makes more sense now.
I'd plate the frame with 3/16" (mainly because I have a 4x4 sheet of it in the shop than anything else), and I'd probably go 1/2 to full diameter of the tube in all directions (1.5" tube = .75-1.5" on all sides overlap).
Any reason you couldn't bend the ends up so that you have full contact with the frame? Then gusset the bend? Just a short J piece to go from the frame to the clamp.
EDIT: I'm presuming that you are fully welding the tube directly to the frame here, not with tabs like Tim.
Actually I am probably going to have to. I forgot about the muffler and I may have to notch the side where the muffler sits (and no I am not going with a smaller muffler). I have about 6 inches of room to move the muffler forward but like 1/2" to move backwards and if I had 4 inches of room, this would be a non issue. So pretty much disregard the above.
I am thinking of going back to my original plan which is simpler and would be have it go to the side wall, drop down on an angle and then cross over flush. I may notch the side where the muffler is and fill it in so I can get it a bit higher.
That is correct there will be no tabs. Just the tube clamps that I picked up from TMR.
Okay, that makes more sense now.
I'd plate the frame with 3/16" (mainly because I have a 4x4 sheet of it in the shop than anything else), and I'd probably go 1/2 to full diameter of the tube in all directions (1.5" tube = .75-1.5" on all sides overlap).
Any reason you couldn't bend the ends up so that you have full contact with the frame? Then gusset the bend? Just a short J piece to go from the frame to the clamp.
EDIT: I'm presuming that you are fully welding the tube directly to the frame here, not with tabs like Tim.